Lash extensions can transform your look by adding length, volume, and drama to your natural lashes. But when it’s time for them to come off—whether due to outgrowth, irritation, or budget reasons—many people wonder how to remove lash extensions at home safely. While professional removal is always the safest option, there are situations where careful at-home removal becomes necessary.
This in-depth guide explains safe, effective, and realistic methods to remove lash extensions at home, what to avoid, how to protect your natural lashes, and how to care for them afterward. Removing lash extensions improperly can cause serious lash damage, so understanding the process is essential.
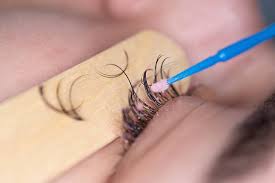
Understanding Lash Extensions and Adhesive
Before removing lash extensions, it’s important to understand how they are attached.
How Lash Extensions Are Applied
Lash extensions are bonded to your natural lashes using a professional-grade cyanoacrylate adhesive. This glue is designed to be:
- Strong and long-lasting
- Resistant to water and oil
- Flexible enough to move with natural lashes
Why Proper Removal Matters
Improper removal can result in:
- Broken or pulled-out natural lashes
- Irritated or inflamed eyelids
- Chemical burns from unsafe products
- Long-term thinning of lashes
Should You Remove Lash Extensions at Home?
While at-home removal is possible, it’s not always recommended.
When At-Home Removal May Be Appropriate
- You can’t access a lash technician
- Extensions are already shedding heavily
- Lashes are twisting or uncomfortable
- You’re experiencing mild irritation (not severe pain)
When You Should See a Professional Instead
- Severe redness or swelling
- Burning or allergic reactions
- Very fresh extensions (less than 48 hours old)
- Extremely strong or clustered bonds
What You Should Never Do
Before learning what works, it’s crucial to know what not to do.
Dangerous Lash Removal Mistakes
- Pulling or tugging extensions off
- Using acetone or nail polish remover
- Cutting lashes with scissors
- Using sharp tools near the eyes
- Rubbing aggressively with cotton pads
Supplies You’ll Need for Safe Removal
Having the right supplies makes the process safer and more effective.
Recommended Supplies
- Oil-based makeup remover or cleanser
- Coconut oil, olive oil, or castor oil
- Cotton pads or lint-free wipes
- Clean mascara wand or spoolie
- Steaming bowl or facial steamer
- Gentle face cleanser
- Towel
Method 1: Steam and Oil Removal (Safest DIY Method)
This is the most widely recommended and safest at-home method.
Why Steam and Oil Work
- Steam loosens the adhesive bond
- Oil breaks down cyanoacrylate glue
- Combination allows lashes to slide off gently
Step-by-Step Instructions
- Clean Your Face Thoroughly
- Prepare Facial Steam
- Steam for 10–15 Minutes
- Apply Oil to Lashes
- Wait 5–10 Minutes
- Gently Slide Extensions Off
- Repeat if Necessary
Pros and Cons
Pros:
- Safe and gentle
- Uses household items
- Minimal lash damage
- Takes time
- May not remove all extensions in one session
Method 2: Oil-Based Cleanser Method
This method is ideal if you already use oil cleansers regularly.
How Oil Cleansers Help
Oil cleansers slowly dissolve lash glue over repeated use.
Step-by-Step Instructions
- Clean your face as usual
- Apply oil cleanser to dry skin
- Gently massage around the eyes
- Rinse with warm water
- Repeat daily until extensions loosen
Best Oils to Use
- Coconut oil
- Olive oil
- Castor oil
- Sweet almond oil
Method 3: Professional Lash Remover Gel (Use With Caution)
Some professional lash remover gels are available online.
Important Safety Warning
These products are strong and can cause eye irritation if misused.
How to Use Safely
- Patch test first
- Keep eyes fully closed
- Apply with microbrush only
- Follow instructions exactly
- Never let product enter eyes
How Long Does At-Home Removal Take?
Removing lash extensions at home is not instant.
Typical Timeframe
- Light extensions: 30–60 minutes
- Full sets: 1–2 hours
- Stubborn glue: Multiple sessions
Signs You’re Removing Extensions Incorrectly
Stop immediately if you notice:
- Pain or pulling
- Redness or burning
- Natural lashes coming out
- Watery or stinging eyes
Aftercare: Caring for Your Natural Lashes
Once extensions are removed, your lashes need recovery time.
Immediate Aftercare Steps
- Clean lashes gently
- Avoid mascara for 24–48 hours
- Do not rub eyes
- Apply nourishing oil at night
Lash Recovery Timeline
- 1–2 weeks: Reduced shedding
- 3–4 weeks: Lash strength improves
- 6–8 weeks: Full regrowth cycle
Best Oils for Lash Recovery
Using oils helps nourish weakened lashes.
Recommended Oils
- Castor oil for thickness
- Vitamin E oil for strength
- Coconut oil for moisture
- Argan oil for flexibility
Common Myths About Lash Extension Removal
There are many misconceptions about removing lash extensions.
Myth 1: Extensions Can Be Peeled Off Easily
False. Pulling damages natural lashes.
Myth 2: Soap and Water Are Enough
False. Lash glue is water-resistant.
Myth 3: All Oils Work Instantly
False. Oil needs time to break down adhesive.
Myth 4: Losing Lashes Means Permanent Damage
False. Most lash loss is temporary with proper care.
How Often Should Lash Extensions Be Removed?
Extensions should not be worn indefinitely.
Recommended Removal Timeline
- Every 3–4 weeks for full sets
- When lashes grow uneven
- If irritation occurs
Can Lash Extensions Ruin Your Natural Lashes?
Lash extensions themselves don’t ruin lashes—improper application and removal do.
Causes of Lash Damage
- Too-heavy extensions
- Poor adhesive quality
- Improper isolation
- Aggressive removal
When to Seek Professional Help
At-home removal isn’t always the right choice.
See a Lash Technician If
- Extensions won’t budge
- Eyes become inflamed
- Lashes are tangled
- You’re unsure how to proceed
Cost Comparison: At-Home vs Professional Removal
Understanding cost helps with decision-making.
Typical Costs
- At-home removal: $0–$20
- Professional removal: $20–$50
Tips to Make Future Removal Easier
If you plan on getting extensions again, preparation matters.
Preventive Tips
- Choose lighter extensions
- Avoid waterproof makeup
- Clean lashes regularly
- Schedule professional removals
Final Thoughts: How to Remove Lash Extensions at Home Safely
Learning how to remove lash extensions at home requires patience, gentleness, and realistic expectations. While professional removal remains the safest option, careful at-home methods using steam and oil can work when done correctly.
Never pull, rush, or use harsh chemicals. Your natural lashes are delicate and deserve proper care. With the right technique and aftercare, you can safely remove lash extensions and allow your natural lashes to recover and thrive.